


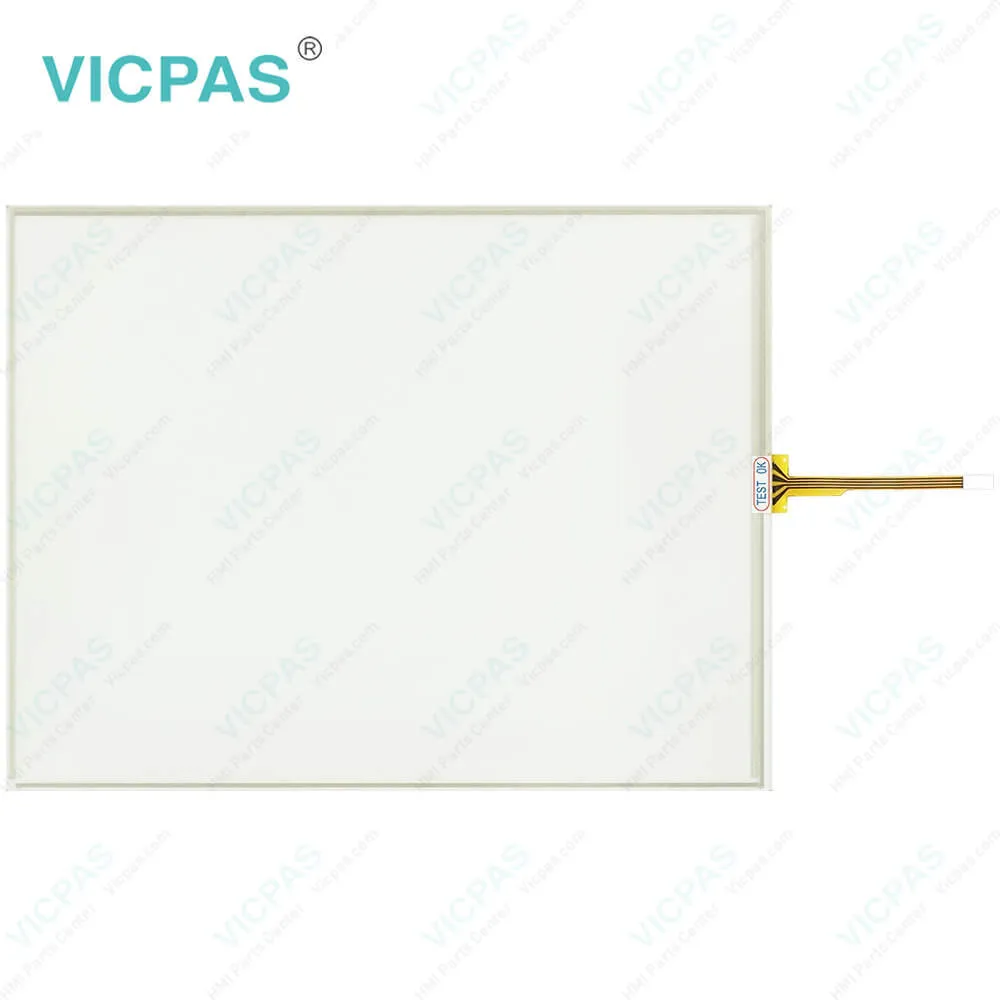
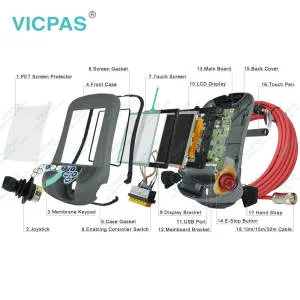
ATLAS Monitors ATM1900T Front Overlay Touch Membrane
| categories | Koyo Other Series |
|---|---|
| Brand | KOYO |
| Model | ATM1900T |
| Warranty | 365 Days |
| Product Line | ATLAS Industrial Monitors |
| Supply | ATM1900T Protective Film Touch Screen Monitor |
| Shipping | 2-4 workdays |
| Terms of Payment | Western Union, T/T, PayPal, Credit Card |
| Update Time | 2026-01-31 02:07:47 |
Shipping
Specifications:
| Brand: | KOYO |
| LCD Backlight: | 270 Nit |
| Product Line: | ATLAS Industrial Monitors |
| Resolution: | 1080 x 1024 pixels (SXGA) |
| Warranty: | 12 Months Warranty |
| Ambient Temperature: | 10 to 90% RH |
| Display Type: | TFT Color LCD |
| Type of Supply Voltage: | 24 V DC |
| Storage Temperature: | -20 to 60 °C (-4 to 140 °F) |
| Touch Size: | 19" |
Related BB Teach Pendant Part No.:
| ATM1900T | Description | Inventory status |
| ATM1500 | KOYO ATLAS Industrial Monitors Front Overlay Touch Membrane | In Stock |
| ATM1500T | Koyo ATLAS Industrial Monitors Touch Glass Front Overlay Repair | In Stock |
| ATM1700 | Koyo ATLAS Industrial Monitors Touch Digitizer Glass Overlay Repair | Available Now |
| ATM1700T | KOYO ATLAS Industrial Monitors HMI Panel Glass Protective Film | Available Now |
| ATM1900 | Koyo ATLAS Industrial Monitors Touch Screen Monitor Front Overlay | In Stock |
| ATM1900T | Koyo ATLAS Industrial Monitors Front Overlay MMI Touch Screen Replacement | Available Now |
ATLAS Monitors ATM1900T Front Overlay Touch Membrane PDF Download:
FAQ:
Question: What are ATLAS Industrial Monitors ATM1900T Touch Screen and Protective Film HMI parts prices?
Answer: Submit a fast quote, send Kernfix an email for best price.
Question: Connection of Video and Touch Screen Cables
Answer: Connect either a 15-pin VGA or DVI cable and either an RS-232 or USB cable if the monitor is equipped with a touch screen. All communication cables should include a chassis ground shield. Hazardous location, Division 2, requires that all cables have adequate strain relief. For this reason, tighten all connector thumb screws securely. If a USB cable is being used, install the provided USB retention bracket. Insert the USB connector through the square cutout in the base of the bracket and pull the cable and body of the connector back through the round hole in the bracket flange. Now insert the bracket into the two slots on the rear of the monitor and slide it forward so the connector is fully inserted in the mating bulkhead connector. Install and tighten two 4-40 x .25" Philips screws.
Common misspellings:
ATM900T
TM1900T
AT1M900T
ATM1q00T
ATM19000T
- Mobile Phone
- *Title
- *Content
 Fast Quote
 Fast Quote
 Worldwide Shipping
 12 Months Warranty
 Customize Service